Connect Webflow forms with Form.taxi

 Reinhard Söllradl
Founder of Form.taxi and web developer since 2000.
Last updated on
March 25, 2025
5:30 min. reading time
In this article, we explain how to connect a form in Webflow to Form.taxi. Setup takes just a few steps and is quick to complete. Form.taxi then takes over form submissions from Webflow and handles further processing and notification.
Webflow is a visual content management system (CMS) and no-code web design platform that allows users to create responsive websites without any programming knowledge. Webflow is especially popular with designers and agencies who need more creative control than with traditional CMSs like WordPress.
The Form.taxi Backend receives form submissions from websites and handles further processing and notification. Websites created with the Webflow CMS can be easily connected to Form.taxi in just a few steps. Forms can be created in Webflow with complete freedom, including the desired input fields and design. Simply enter the provided submission address in Webflow's form settings, and the submissions will be transferred with Form.taxi. Form.taxi operates the servers for storing and processing form submissions within the European Union and complies with the data protection standards according to the GDPR.
Prerequisites
Here's what you need to follow this guide:
- Webflow account
- Form.taxi account. The free plan is sufficient for setup.
Step 1: Add form to Webflow page
(If the form already exists in Webflow, skip to Step 2.)
The first step is to create your form in Webflow. You can customize the form's structure and design completely according to your requirements.
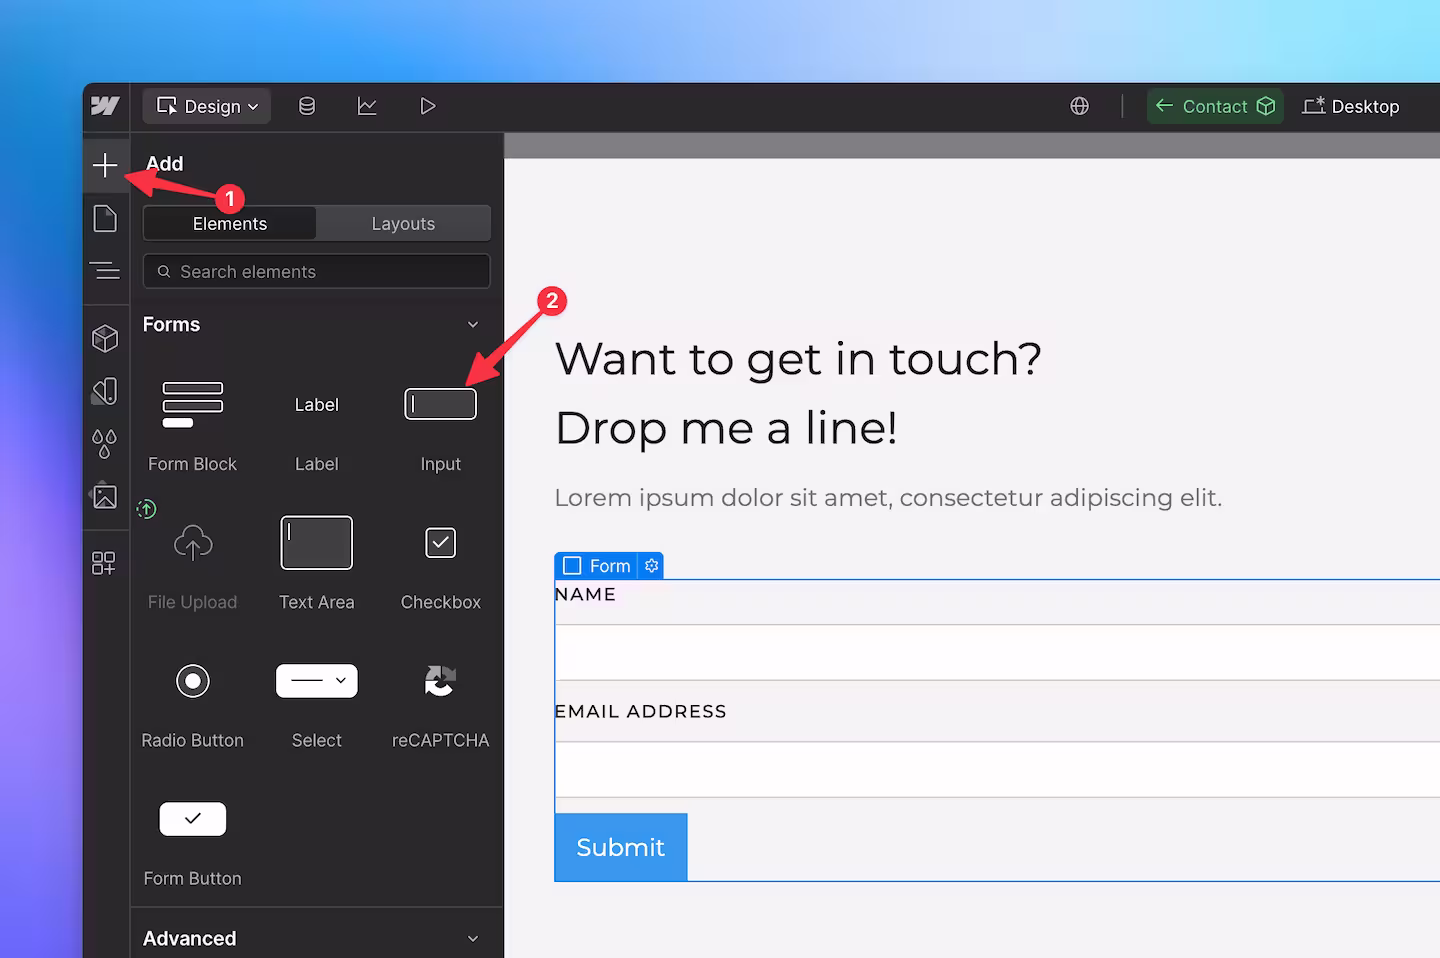
To add a new form to a Webflow page, start by inserting a new Form Block element in the designer at the desired location on the web page.
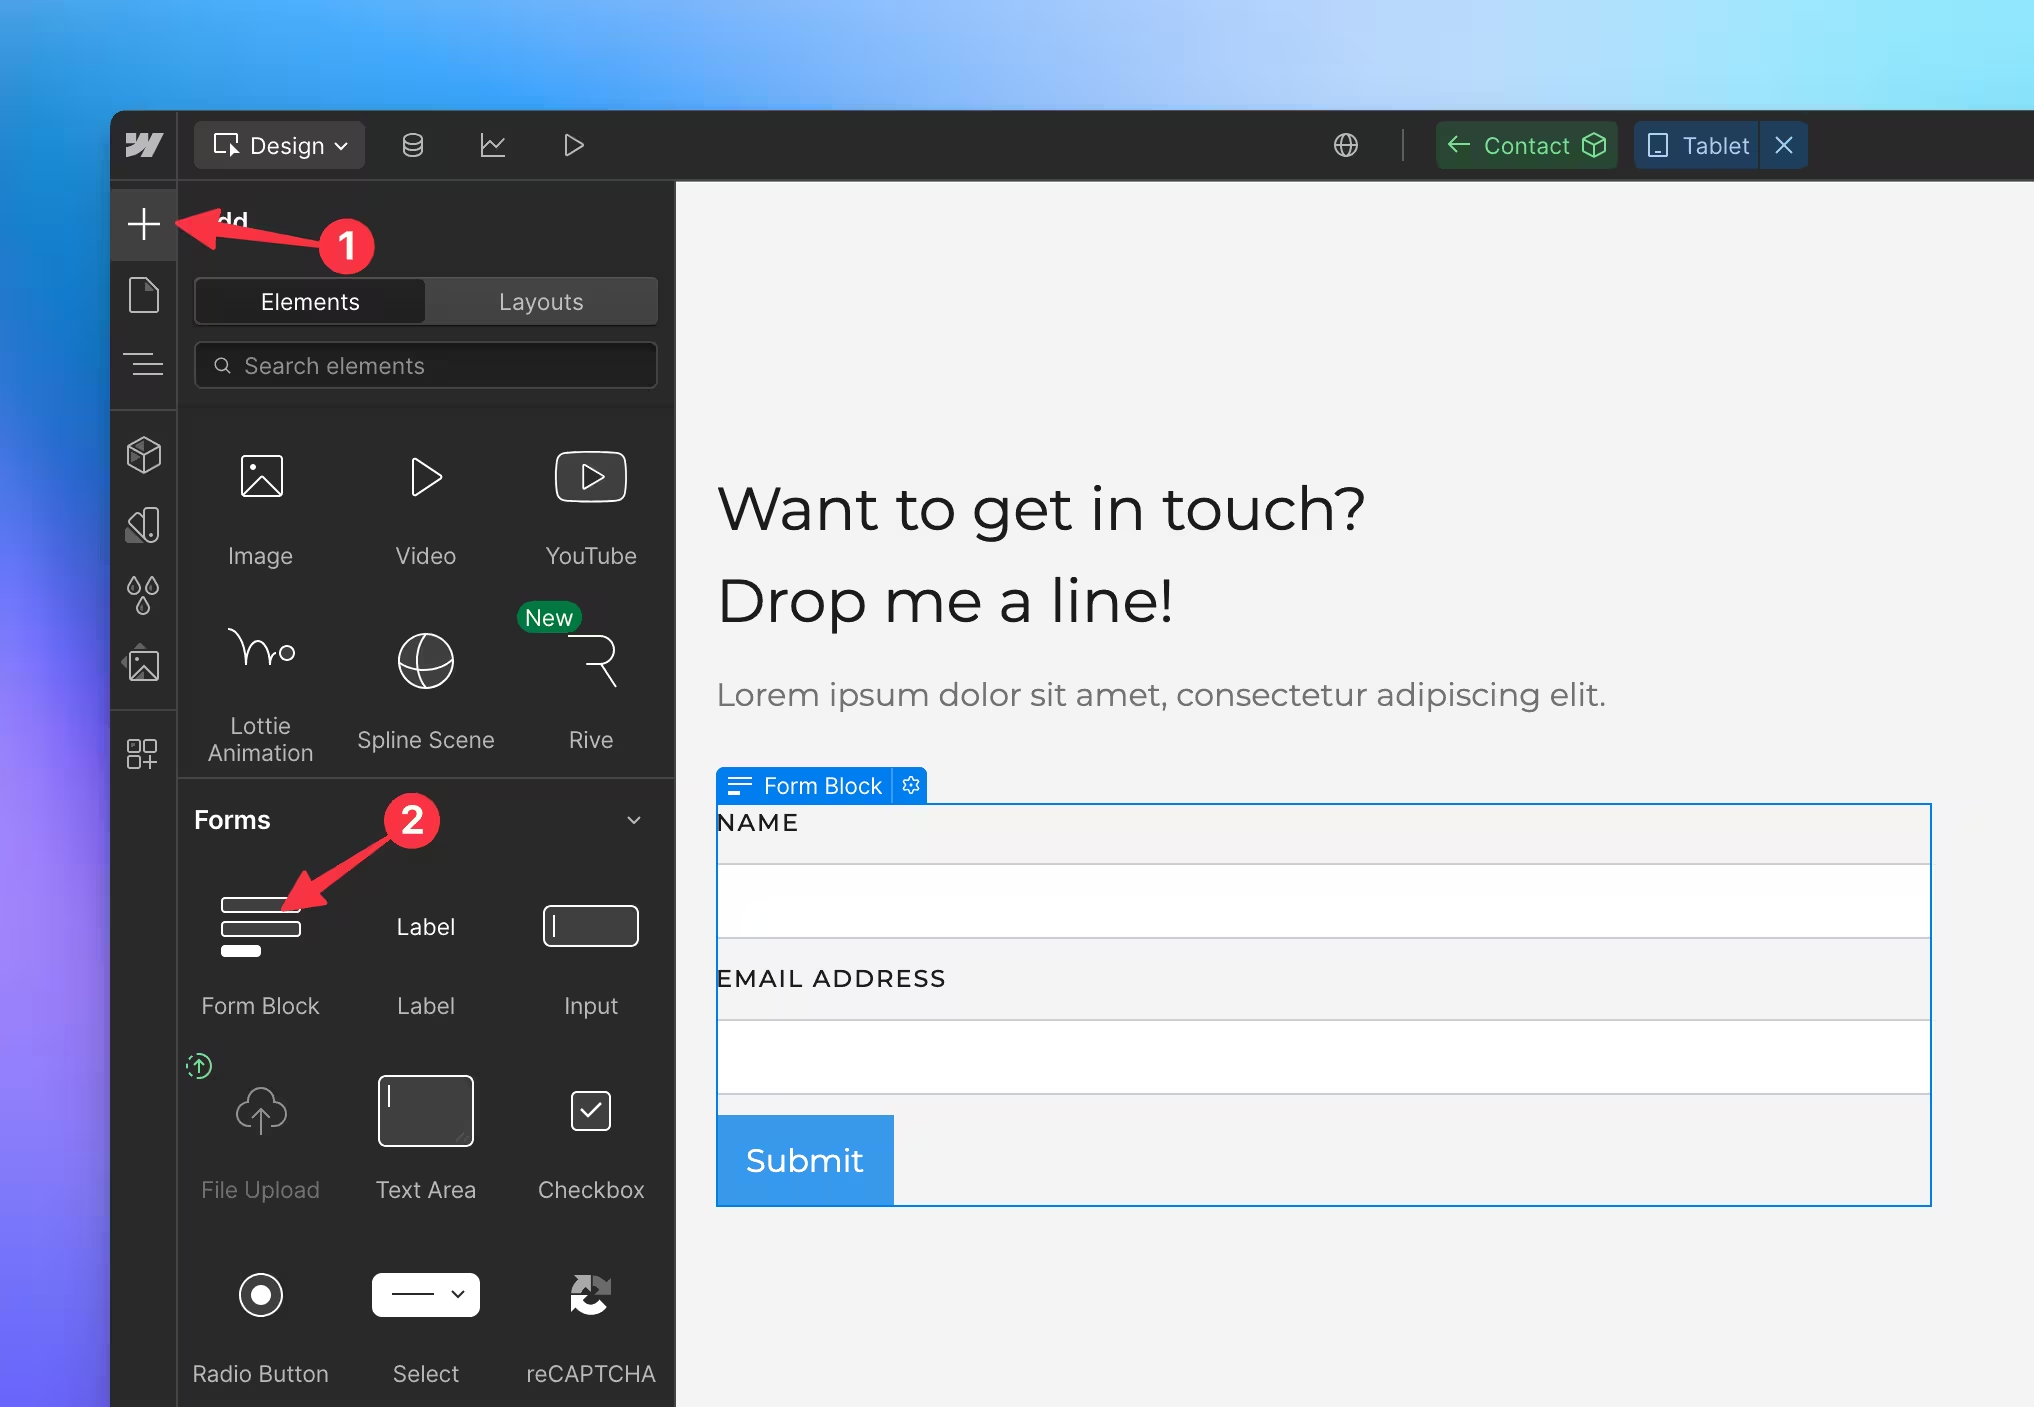
A new form block comes with two form fields by default. Add additional input fields to your form as needed by inserting them from the Forms section.
If you want to learn the basics of creating forms, Webflow offers this tutorial video:

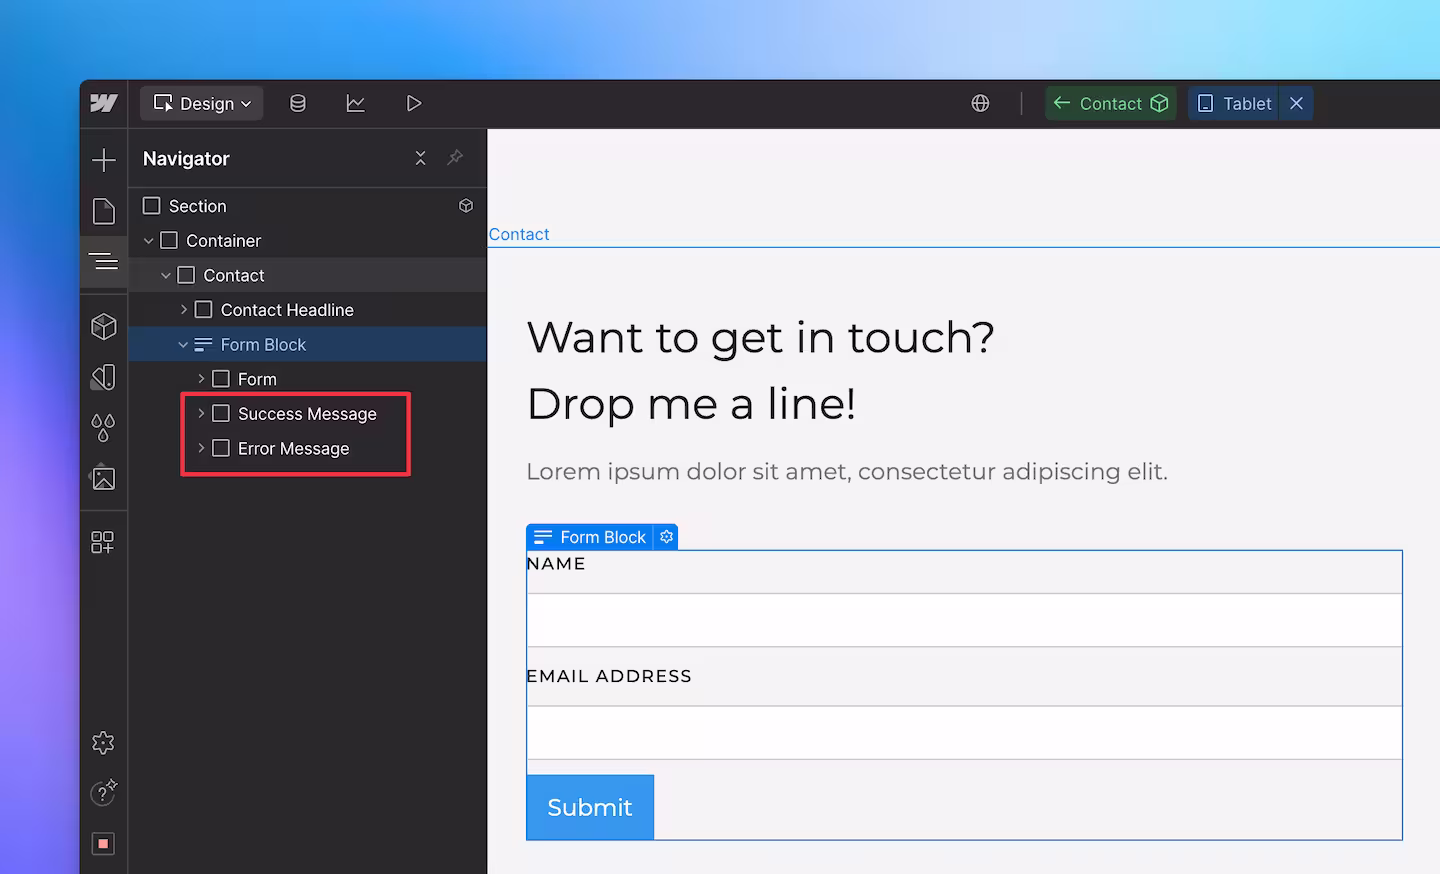
You can ignore the two elements for displaying a success or error message, as the message display is subsequently handled by Form.taxi.
Step 2: Create a form connection at Form.taxi
In order for Form.taxi to handle the transmission of form submissions, a unique sending address is required for the form. You will receive this by registering the form in the Form.taxi online panel.
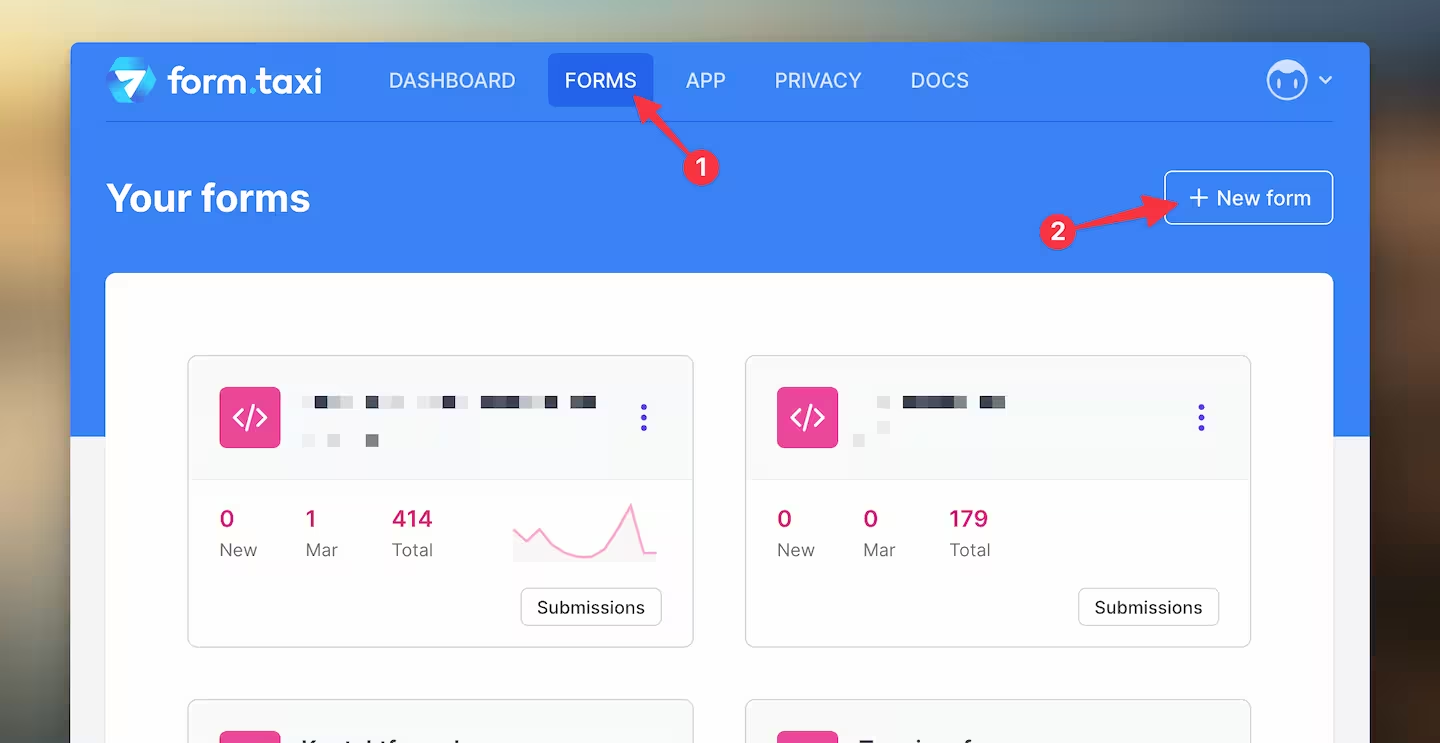
Open the Form.taxi Panel and log in with your account. In the Forms section, you'll see an overview of all your existing form connections. You can create a new connection for your Webflow form by clicking New Form.
Create the form at Form.taxi with the desired information. Please note the following instructions:
- Select Form content: Individual form
- Enter the address of your Webflow website as the Website address. For example: https://my-site.webflow.io
- As a Success message, you can specify a custom web page in addition to the Form.taxi default page, which will be displayed to the user as a confirmation after the form has been submitted. To do this, create a suitable page on your Webflow site and specify its web address (URL) in Form.taxi.
After creating the form, you'll see the sending address. This address will be used to transfer form submissions to Form.taxi. Copy the sending address for use in Webflow.
Step 3: Add send connection to Webflow
To ensure that submissions from your form are transferred using Form.taxi, you only need to enter the sending address in the form settings in Webflow.
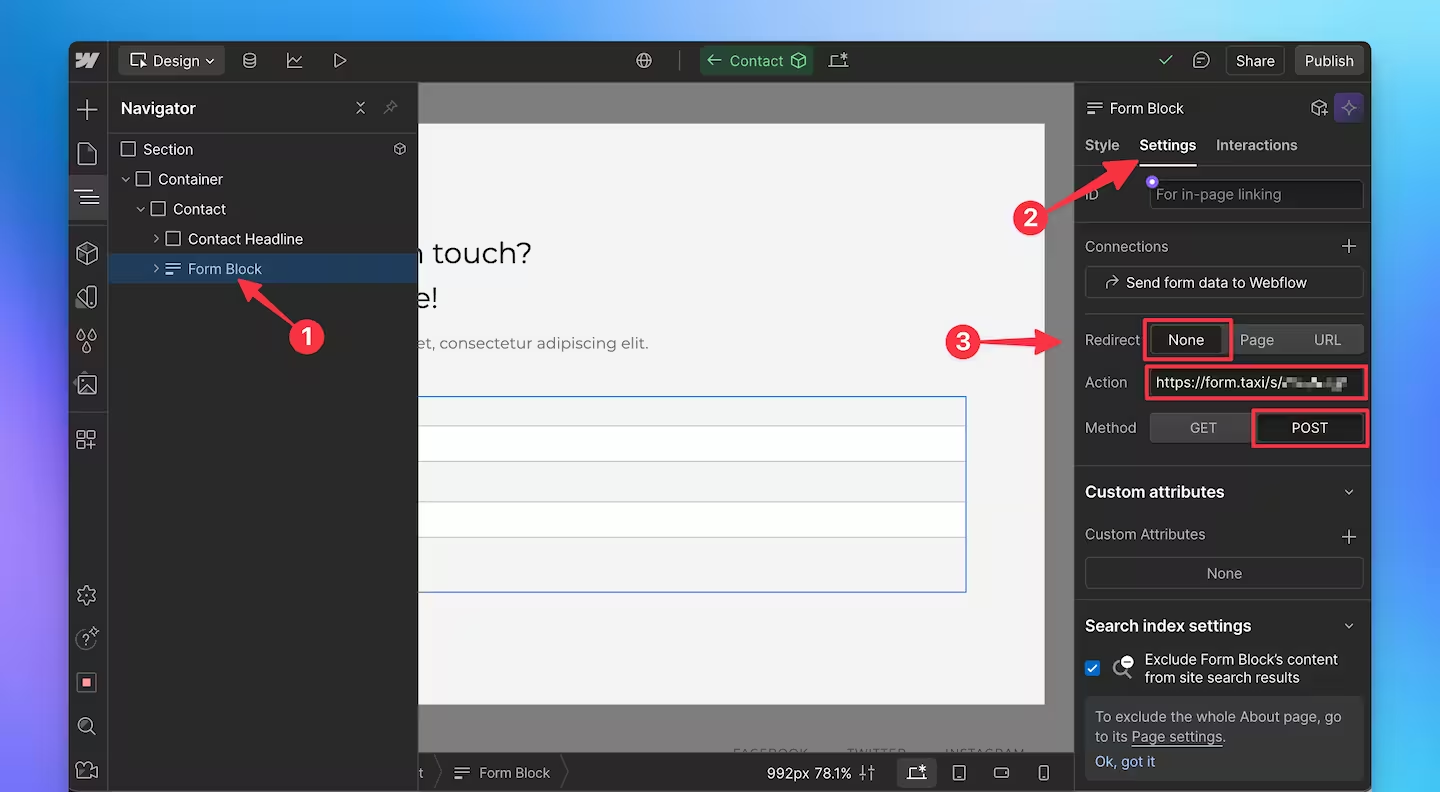
To do this, select the Form Block of the form in the Navigator. Now you can configure the settings in the right sidebar as follows:
- Redirect to None. The display of the success page is handled by Form.taxi.
- Action: Enter the full sending address here.
- Method: This setting must be set to POST.
This establishes the connection to Form.taxi and you can send a test message using the form.
Spam protection through honeypot
Form.taxi offers a range of technologies to best prevent spam submissions via forms. You can configure our spam filter or the use of captchas in the online panel.
One recommended protection method is the use of a so-called honeypot. This is nothing more than a normal input field. What's special about this is that this field is hidden and thus not visible to website visitors. If a spam bot submits the form with the honeypot field filled out, the trap snaps shut and the submission is immediately filtered out.
Add a honeypot to the Webflow form:
- Add a new input field to your form in Webflow.
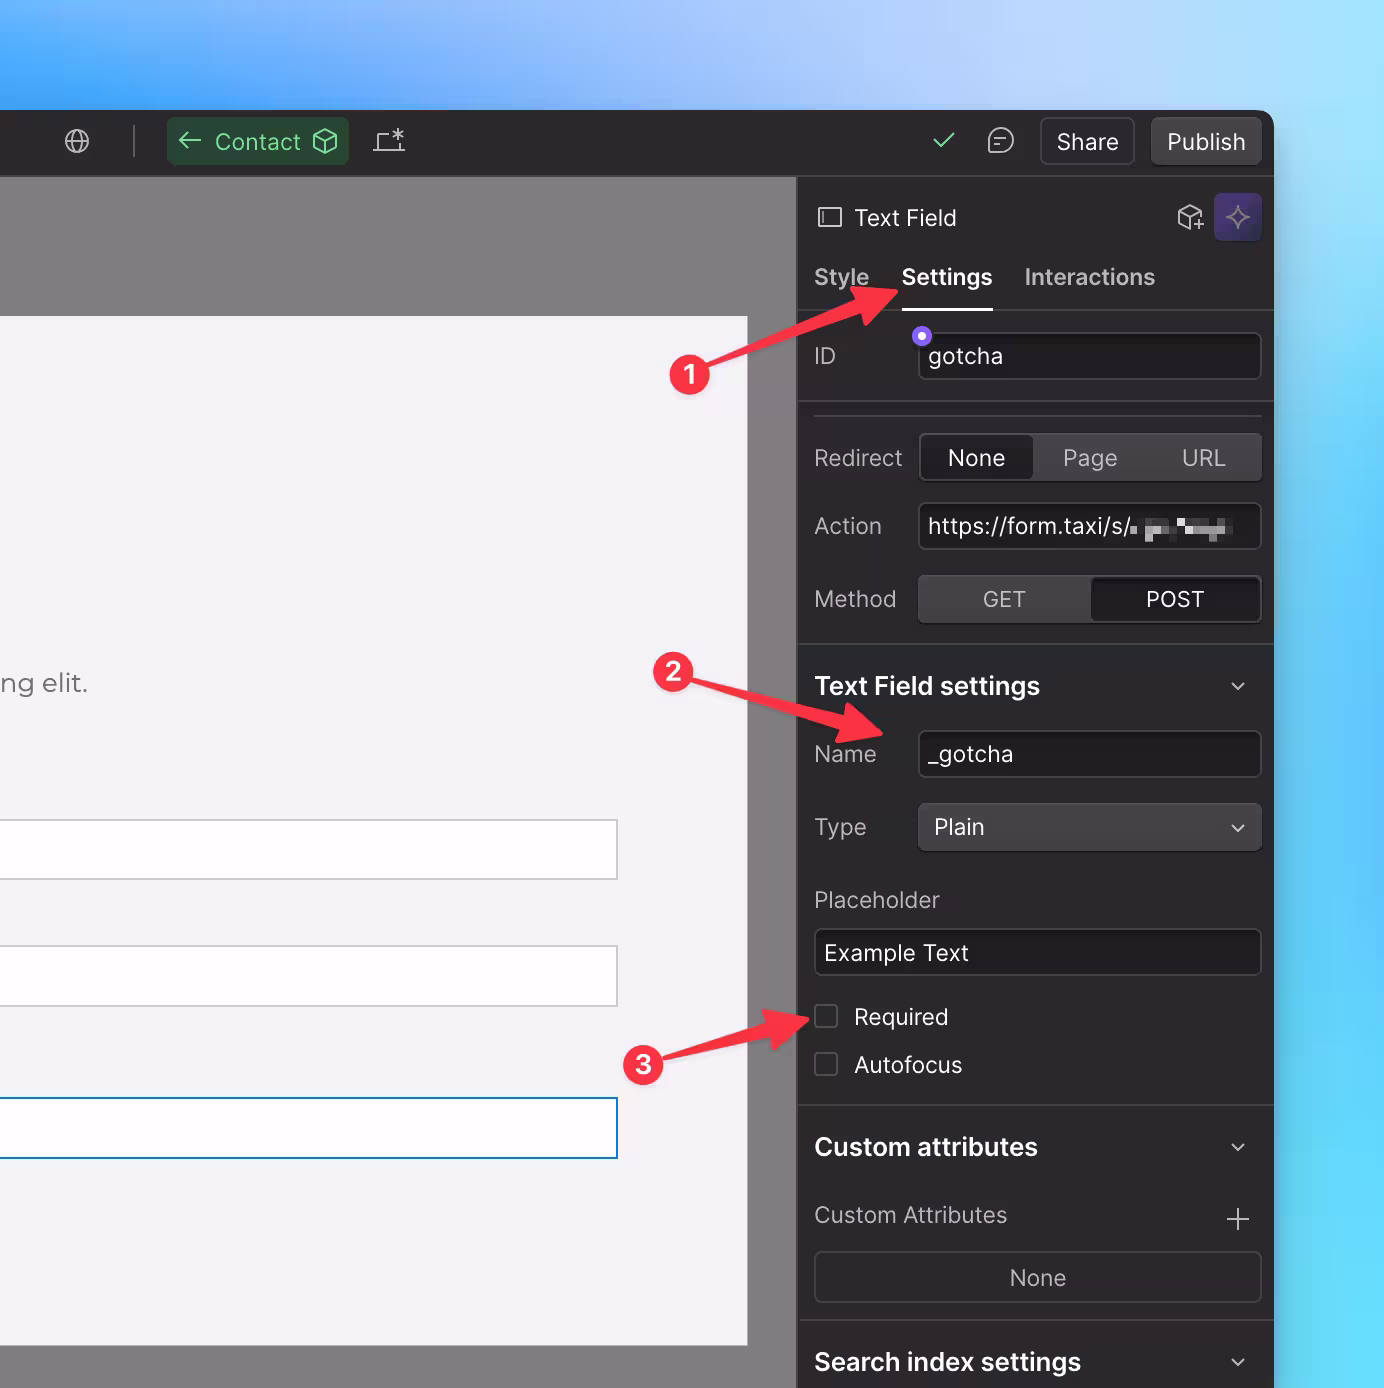
- Set the name of the input field to _gotcha
The field name must match the setting in Form.taxi for this field to be treated as a honeypot. _gotcha is the field name Form.taxi uses by default for honeypots. If you want to use a different field name, you can enter it in the form settings.
- This field cannot be required. Therefore, deselect the Required option.
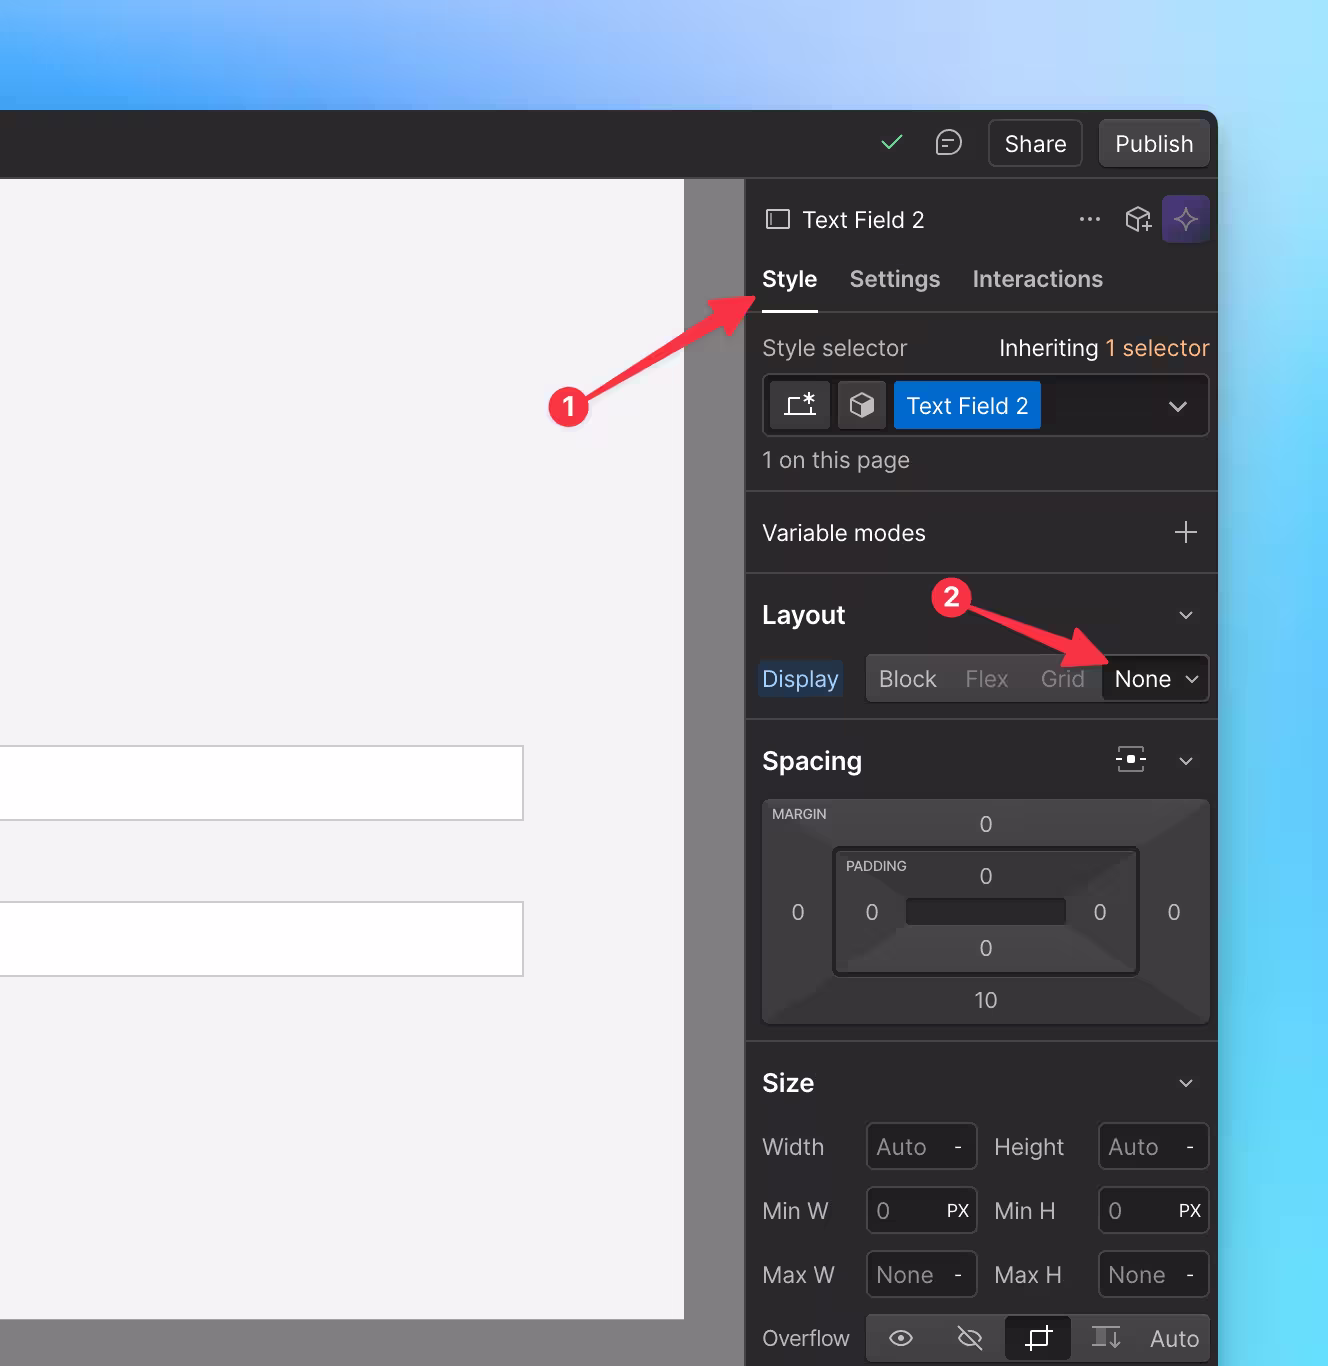
- Hide field
To prevent this field from being visible to site visitors, we need to hide it in the design settings. To do this, go to the Style tab and select the Display setting None under Layout. With this setting, the form field will still be there, but will not be visible.
Further setting options
You can make various adjustments to the form settings in the Form.taxi Panel to adapt the shipment transmission to your needs.
Confirmation Emails
For example, you can automatically send an email message to the users of your form as a confirmation of receipt. The message text and other settings can be customized to suit your needs in the Panel. This confirmation email feature is available starting with the Standard plan.
Feedback or questions?
Please send us your message. We will personally address your concerns.